• Advertisement
Welcome! If you can see a big advert here, you're not logged in. Log in, or if you're not registered, register, and then log in, and the big ol' advert will disappear. (Subject to admin getting the settings right)

My first car by S. Barrett - Actual progress (sort of)

Where the lost, lonely and mentally ill can now be found chatting about MISERABLE motor vehicles. No O/T posts.

Re: My first car by S. Barrett - Tools for a TOOL

Postby Seth » Tue Oct 02, 2012 11:19 pm

Knot wheels come either cup shaped or 'straight'.

Image

Both have their uses but neither will get into really tight corners. Absolutely don't use them or any other grinding type wheels without hand and face protection. Normal grinding wheels fit using the nuts that come with the grinder but the knot wheels have they're own thread so are fitted directly to the spindle. I buy mine at autojumbles.

For primer I invested in some of this stuff from Bilt Hamber for the Oxford about 4 years ago?

http://www.bilthamber.com/paints-and-coatings/electrox

The tins are only just drying out a bit much to use and I have painted lots with it, using a brush. It is expensive but seems to be very good indeed. The rear arch I replaced on the Herald over 18 months ago was coated in some of this stuff and I've yet to get around to putting any blue over the top. It shows absolutely zero signs of any rust coming through which would have happened in a matter of weeks with normal primer given similar outdoor storage/winter use. Probably a bit excessive to use all over but would be a good way to add protection to awkward areas like screen aperture and hidden places like the floors.
Not Always Auto

Rootes built Cortinas under licence and just changed the badging.
Seth
IAN DURY
 
Posts: 342
Joined: Thu May 10, 2012 7:37 pm

Re: My first car by S. Barrett, aged 26½

Postby Macoli » Wed Oct 03, 2012 1:01 am

Barrett wrote:Right. I need some advice on the right way to spend my money on TOOLZ.

GRINDA

I just wanna confirm from our grindin' experts - I want a 115mm/ 4.5" grinder, right? Right.

Any advice on the best sort of knotwheels to buy would be appreciated too. I always read about people moaning about cheap grinding discs and I presume the same applies to knotwheels - quality is actually worth paying for.

A grinder that has the switch directly under your thumb is best, specifically the thumb that will activate the switch purely by inertia alone the moment the bastard takes a big effing bite out of something you were not aware was going to be a problem. I bought a full-face mask when doing a friend's rear axle mounts on his Dolomite, and found out why we have "near miss" reports in industry as the grinder left witness marks across the mask at moustache level when it kicked out of my hands (and as you may know, I'm not a slight fellew so it was a bit of force) and continued running at ear-level on the deck beside me with me not knowing what the hell had just happened - the near miss reports are best filled in to show how much your hands are shaking...

PRIMA
After I make my new floors all shiny I'm going to have to slap a lick of paint on to stop it rusting again slow the rusting process. There are several sections that will need to be cut out and have some new bits glued in, but I'm not sure when this is going to happen. Should I splash out on some 'weld-through' primer even though it might potentially be sat for a couple of months before any welding actually gets done, or shall I just splash on some regular cheapo primer and then clean it up again before and welding happens?

After the new metal goes in I suppose I'm going to have to paint it in 'proper paint'. I want to get the bulkhead/ screen surround in the actual final colour of the finished car so once everything gets bolted back to it I won't have to worry about it again. No idea how this will happen, hopefully somebody will have a compressor I can borrow. As the floors aren't visible I basically want to slap on the thickest, most protect-y paint I can to stop them turning into holes again. Any tips on what's best for this sort of thing? There seems to be about 2,000,000 options when it comes to this so any nudges in the right direction will be helpful.

Right, I think that's it at the mo. Cheers!


Black&Decker powerfile is an awesome piece of kit and can get into many awkward corners, just let it do the work rather than leaning too heavily on the abrasive band.
Macoli
IAN BEALE
 
Posts: 13
Joined: Fri May 11, 2012 10:43 am

Advertisement

Re: My first car by S. Barrett - Tools for a TOOL

Postby Amazo » Wed Oct 03, 2012 4:28 pm

My rule for handling a grinder is simple - I treat my grinder like a cobra that could bite me at any time; firm grip, never take my eye off it, and never put it down until it's switched off and stopped spinning completely (and then, never 'face' down) And if I change disc, I unplug it, pure and simple. I've had many years of injury-free grinding and I intend to go on have a finger count greater than Dave Allen's.
Amazo
IAN McSHANE
 
Posts: 137
Joined: Fri May 11, 2012 6:34 pm

Advertisement

Re: My first car by S. Barrett - Tools for a TOOL

Postby Barrett » Tue Nov 13, 2012 2:08 pm

Right. Since the last exciting update I got hold of a cheap grinda, selected because of its long warranty and sturdy construction. And absolutely not because it has the word EXTREME in huge letters on the box. Not at all. My clinical procrastination took hold directly I had bought it, so it took over a month for me to get some knot wheels and actually give it a waz. My whole life can more or less be summed up by the 'rolls eyes' emoticon so I won't actually use one here. You get the idea.

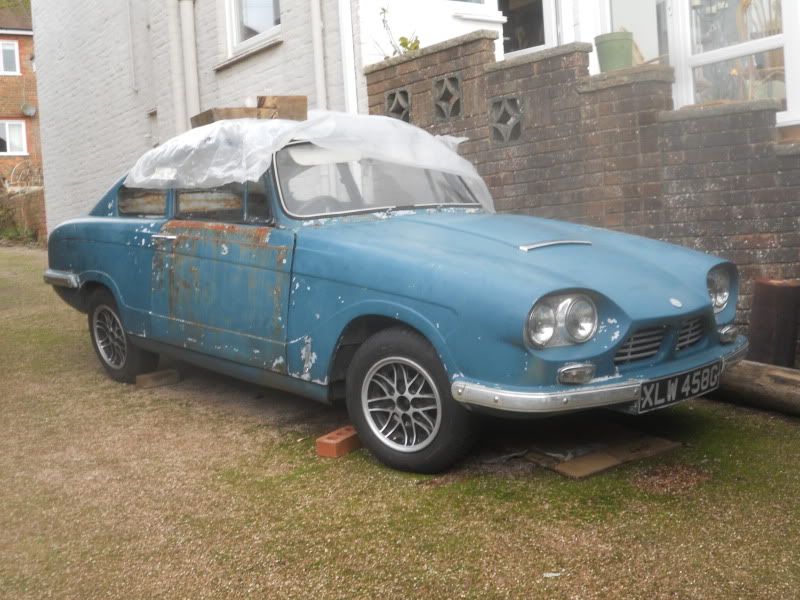
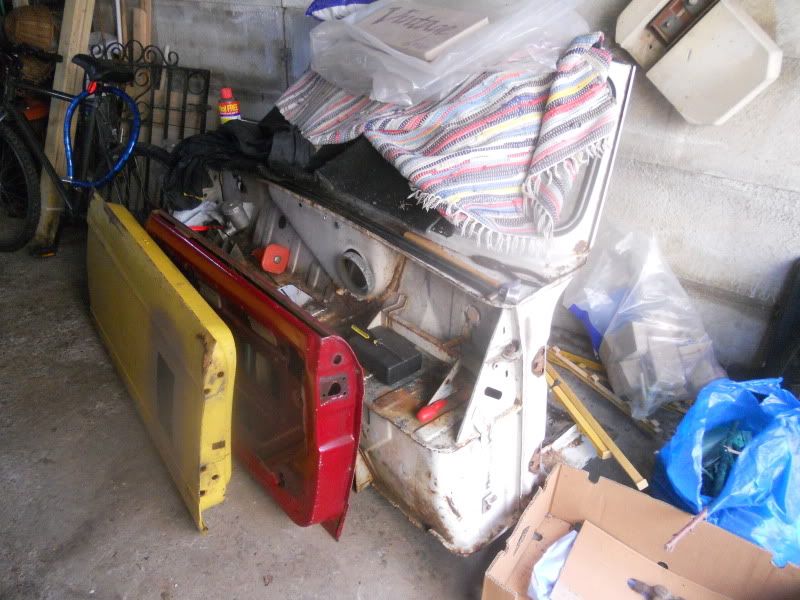
Along with the grinder I had managed to assemble a DIY Bond kit in the garage. The bulkhead was an ebay buy ages ago, the red door I scored for under £30 and is almost mint. The yellow one is from Seth's pile of Herald bits and needs some repairs to the bottom of the skin but is essentially sound. So far I've resisted arranging these bits into the shape of a car and sitting in it for an amusing photo op, but it's only a matter of time
Image

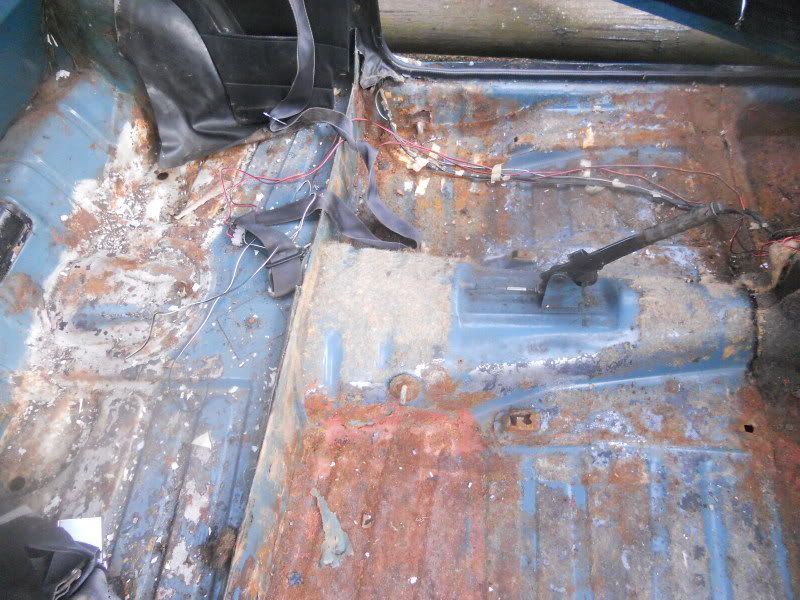
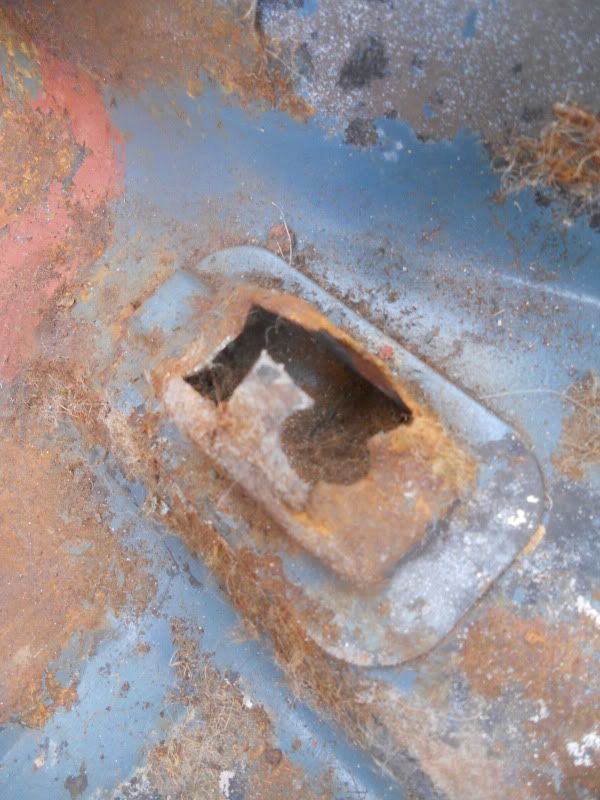
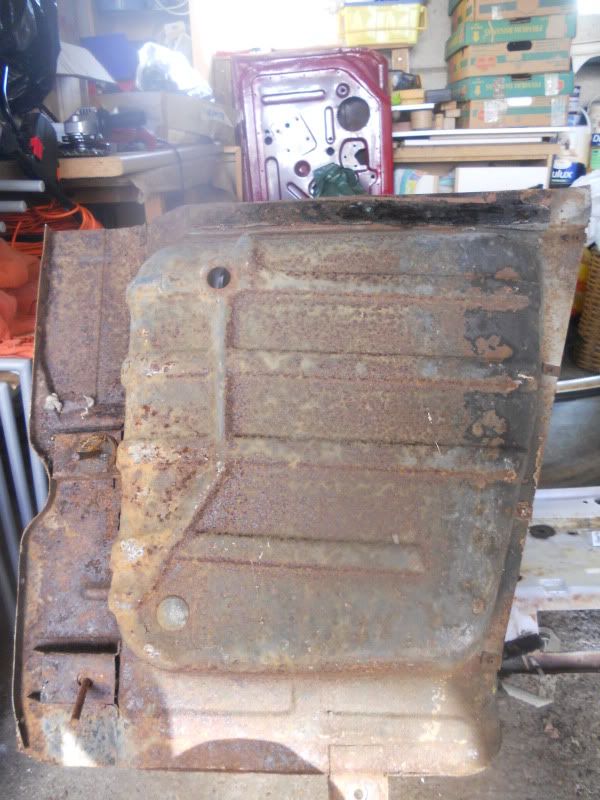
Last Saturday I finally decided to start cleaning the bulkhead up a bit and investigating the extent of the repairs it'll need. I chose the passenger floorpan as my starting point
Image

After the initial nervousness wore off I started to get a feel for the grinder. It does have quite a kick to it and I can see how you could easily lose control and do something quite nasty to yourself. Luckily I'm paranoid about that sort of thing at the best of times so hopefully I'll escape with all my fingers/legs intact. Here's a totally set-up 'action shot' of me. I'd just slipped out of my steel toe-caps and asbestos overalls for a second, honest
Image

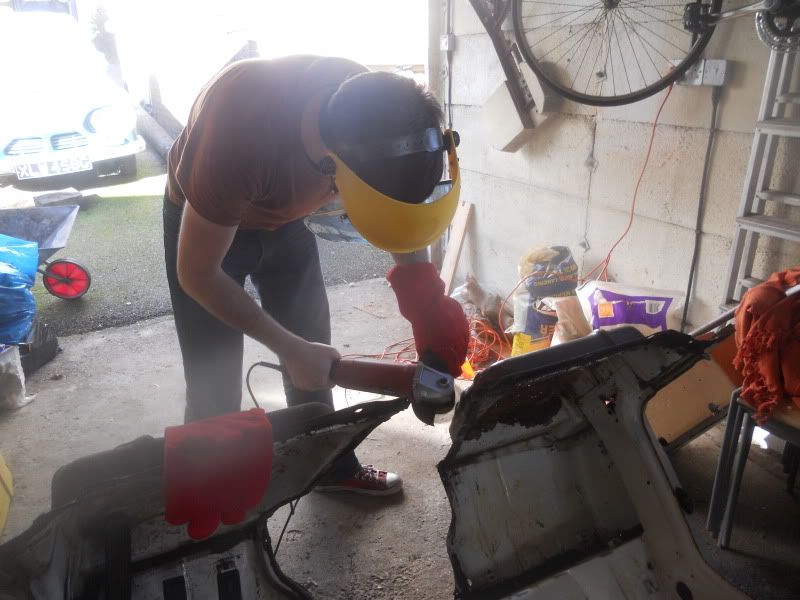
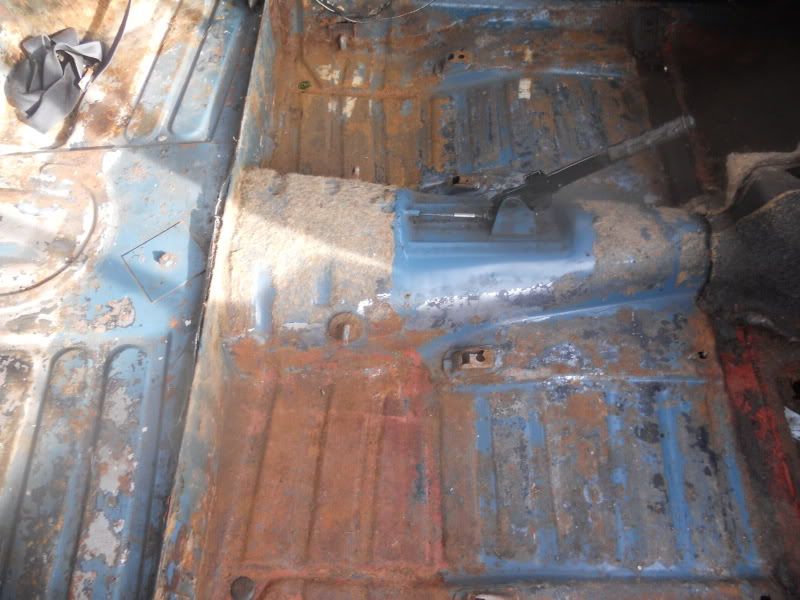
POWERFUL. Anyway, after a while I had this. Deeply pitted and full of small holes. hmmm.
Image

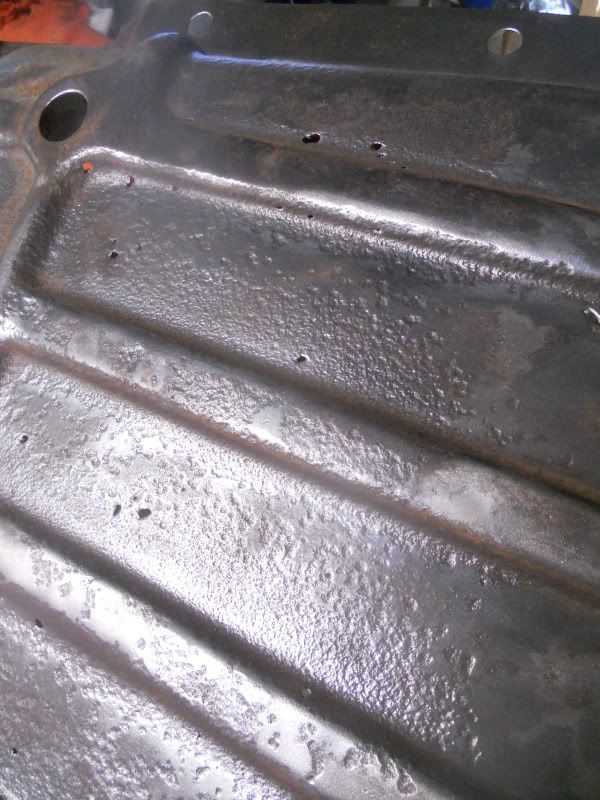
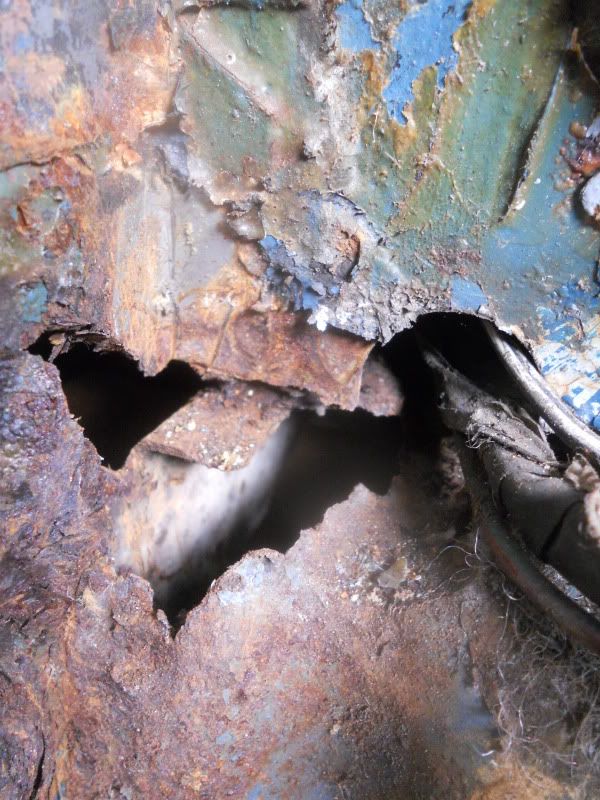
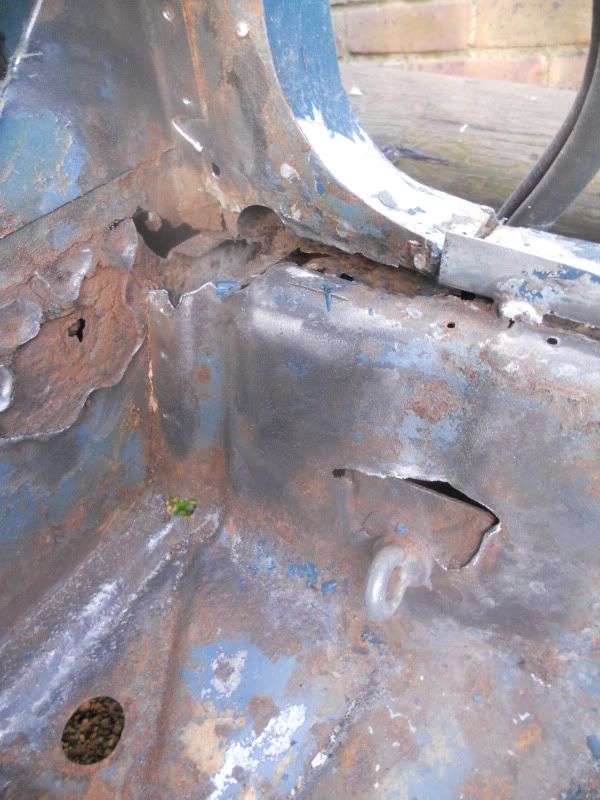
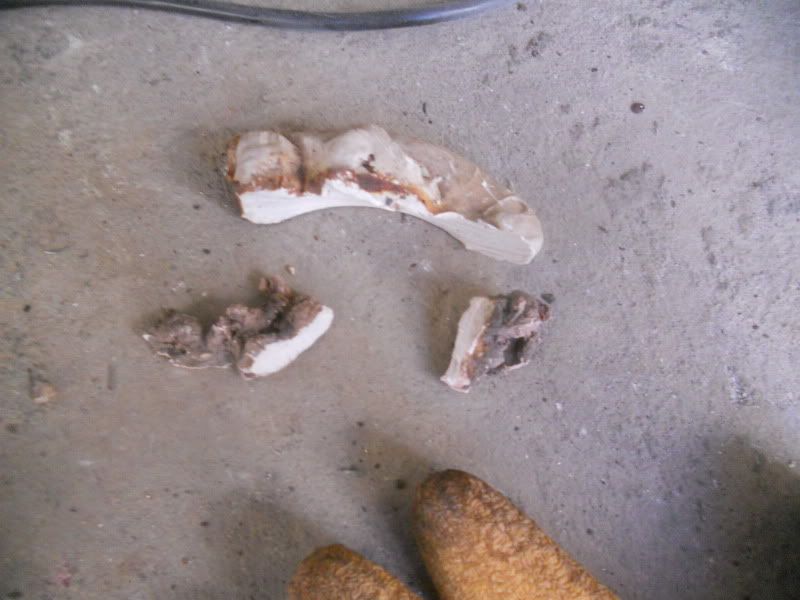
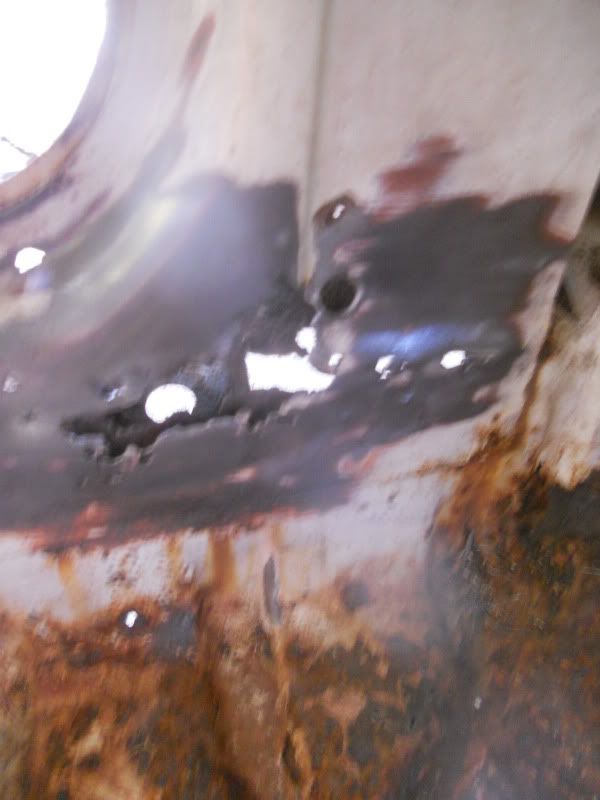
Hopefully those are small enough to glue together without cutting bits out and making repair sections. I'm sure I'll find out when I start welding (lol). After the floor pan I moved on to the base of the A pillar, which looked like the worst bit of the whole unit with some very suspicious filler repairs. Here's what it looked like after a quick going over
Image

Lovely! That wob was just the tip of the iceberg
Image

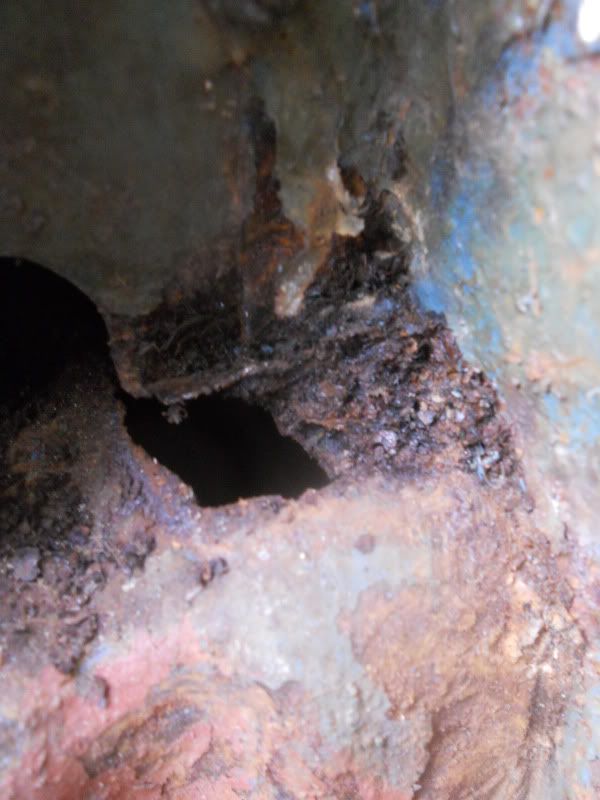
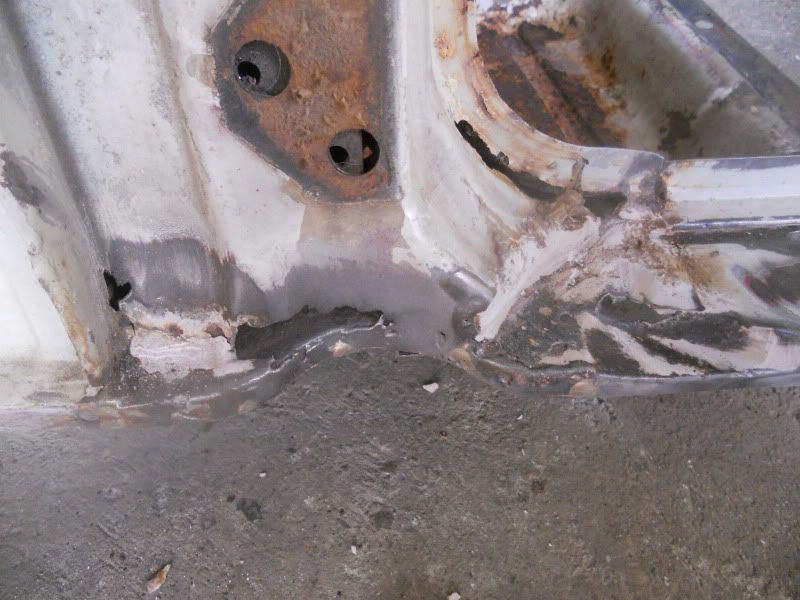
For some reason I didn't take a photo of it all cleaned up with the last dregs of filler removed, but here's a terrible shot from the 'other side' which gives an idea of the extent of rottage.
Image

This was the 'bad side' so I was sort of expecting this, and now it is all in bare metal I can make sense of the double-skinned construction a little better and it doesn't look like it'll be too much of a job to put right. The hardest thing will be getting the curve of the door aperture right. I need to check the condition of the one in the car as I might be able to get away with chopping that bit out and chucking it in here. Mr. Hardcore of the blue forum has offered to teach me how to weld, and Bickle has a mig I can borrow, so that's the next step. It's a little frustrating that every time I want to do something to the car I essentially need to be taught a new skill first, but that is sort of the entire point of the whole endeavour I suppose. It just makes things go very slowly.... When I get some proper ear protection I'm going to crack on with the other ('good') side of the floor and hopefully find zero holes (apart from the one I already know about) and get that side primed and protected and ready to go. I'm just ignoring the A-pillar screen rot at the moment.
Hoow do I go to my thread ? How do I find my forum ? Howdo I go to the page I am typing?
User avatar
Barrett
SIR IAN McKELLAN
 
Posts: 165
Joined: Tue May 08, 2012 8:03 pm

Advertisement

Re: My first car by S. Barrett - Actual progress (sort of)

Postby Jonny69 » Wed Nov 14, 2012 3:05 pm

It's only the first few jobs you need to be taught to do. Once you've done a few things like that you can pretty much work the rest out for yourself. Being shown how to weld will be a massive help though - working it out for yourself would be a bit of a mare.
User avatar
Jonny69
IAN McSHANE
 
Posts: 138
Joined: Thu Sep 06, 2012 4:00 pm

Advertisement

Re: My first car by S. Barrett - Actual progress (sort of)

Postby Vulgalour » Fri Nov 16, 2012 11:41 pm

^I agree with this, especially the welding. I *still* don't have my own welder, but having been shown the rudiments really did make learning easier than had I had to work it out myself. Welding seems to be one of those things that can be simultaneously easy-peasy and the hardest thing ever.

I enjoy the bit you're doing at the moment, and the bit where I'm putting the finishing touches on, it's the stuff in the middle that gets me frustrated.
Vulgalour
Val Doonican
 
Posts: 206
Joined: Tue Jul 31, 2012 12:42 pm

Advertisement

Re: My first car by S. Barrett - Actual progress (sort of)

Postby Barrett » Sun Nov 25, 2012 5:44 pm

Quick recap:

Stripped out the rest of the interior
Image

Found some more holes
Image

Image

scraped off the remnants of the sound deadening stuff. I genuinely really enjoy this sort of thing
Image

Seat mounting point. This one should hopefully tap back into shape and glue back together. The front holes are all split and warped and will probably need to be patched, just flat squares with holes in the middle, I'm sure* it'll be a doddle
Image

Started to clean up the big hole. This is where it gets complicated. The outside of the B-pillar/ door shut is GRP, the inside is steel. As is the inner section, which is the bit that has rotted out. I'm sure this won't be a doddle.
Image

This is all MOTable due to the proximity to the seat belt mounting point (which isn't as bad I was expecting, it's only the 'outer' bit of the double skin which has gone. Anyway, it all needs to be done properly so when I do finally get behind a Mig I'll be sorting all the other little stuff first and working my way towards this bit as it looks like a really complicated arrangement. This is more or less the only 'in situ' welding it'll need (touch wood) though. I'm still working towards a summer 2013 return to the road but I do need to pull my finger out and get cracking with the metalwork....
Hoow do I go to my thread ? How do I find my forum ? Howdo I go to the page I am typing?
User avatar
Barrett
SIR IAN McKELLAN
 
Posts: 165
Joined: Tue May 08, 2012 8:03 pm

Advertisement

Re: My first car by S. Barrett - Actual progress (sort of)

Postby Barrett » Wed Nov 28, 2012 8:08 pm

Fixed it!

Image

Well, I put some wheels on anyway. Much better.

Looks nearly bang-on at the front (the actual car looks well odd from this angle though, it needs more of a valance really)
Image
Image

Rear is less good, but the odd slope of my drive is contributing to the tuck-in anyway and I imagine it will 'settle' a bit. I still think lowering blocks to bring it down a touch would be a big improvement. We'll see.
Image

Rolling radius is actually a little smaller than the standard steels I think, though the sidewalls on these tyres are quite tall. I'm sure there are ways to make it look better when the time comes, but I'm glad to have them on finally to confirm that Cosmic do indeed look T***S AM******LS on the Bond. And I've still not seen another GT4S with these on either.
Hoow do I go to my thread ? How do I find my forum ? Howdo I go to the page I am typing?
User avatar
Barrett
SIR IAN McKELLAN
 
Posts: 165
Joined: Tue May 08, 2012 8:03 pm

Advertisement

Re: My first car by S. Barrett - Actual progress (sort of)

Postby garycox » Wed Dec 12, 2012 2:23 pm

Looked better on the Maestro...
MINIMUM JOY
garycox
IAN McGASKILL
 
Posts: 50
Joined: Tue May 08, 2012 9:43 pm

Advertisement

Previous

Return to Bitter Men

Who is online

Users browsing this forum: No registered users and 12 guests

cron