-
- Advertisement
My first car by S. Barrett - Actual progress (sort of)
39 posts
• Page 2 of 4 • 1, 2, 3, 4
Re: My first car by S. Barrett, aged 26½
![]() by Vulgalour » Sat Aug 04, 2012 8:37 pm
by Vulgalour » Sat Aug 04, 2012 8:37 pm
Those floors are nowhere near as bad as described, I'd be more worried about the state of that door bottom really and that should be an easy enough panel to replace if they're just standard Herald doors. Looking at the info you've shared so far, I don't think you've done too badly there.
- Vulgalour
- Val Doonican
- Posts: 206
- Joined: Tue Jul 31, 2012 12:42 pm
Re: My first car by S. Barrett, aged 26½
![]() by garethj » Sun Aug 05, 2012 1:57 am
by garethj » Sun Aug 05, 2012 1:57 am
Don't pull up too many rusty bits at the same time.
1. You'll forget what it's supposed to look like when it comes to repair panels
2. It's disheartening to see so much fresh air from the inside.
Just do a section at a time. Can you get a parts book which has pictures of available repair panels? It'll help you decide where to start cutting the rust out. For small patches and complete heros, making your own patches is fine, but sometimes having a repair panel is the best way forward, it'll have all the right creases in place and it speeds up the work which does wonders for your enthusiasm.
- garethj
- IAN McGASKILL
- Posts: 62
- Joined: Sat May 19, 2012 12:50 pm
Advertisement
Re: My first car by S. Barrett, aged 26½
![]() by Seth » Sun Aug 05, 2012 10:14 am
by Seth » Sun Aug 05, 2012 10:14 am
garethj wrote:Don't pull up too many rusty bits at the same time.
I think that is probably the most important advice proffered so far, especially to someone with little experience. Unless you are really sure how to tackle a full restoration from the ground up (and have the necessary space etc) then pulling a car completely to bits is horribly demoralising.
Don't forget when looking at tools perhaps via boot sales etc as IKB suggests or even 'new' ones that metric sizes will be pretty much useless. So while a shiny socket set might look great you might end up using very little of it. However a bigger set that has metric and imperial might work out cheaper than just buying loose imperial bits and does future proof you against buying a French microcar or similar.
The good news is that the car runs, drives and stops so you're on to a winner already. Getting it to run better is likely to be just a matter of servicing and adjustment. The other good thing about this car is that it seems to have all its Bond specific trim intact.
As you know the doors will be easy enough to find though actual good solid ones are quite rare to find and tend to be expensive.I don't know for sure but the door glass might be peculiar to the Bond. Its certainly not the same as a Herald saloon so you'll need to ask Bond people or compare to pictures of convertible glass. If its the same as a Convertible it will obviously save some work if you managed to get decent complete convert doors.
Is the dash surround drooping in front of the gauges or just that shape?
I have no experience of fibreglass repair but wonder if dangling a heavy weight (brick?) on string tied to the boot lip might pull that out over a period of time?
Oh, lets have some underbonnet shots too. If nothing electrical is working I wonder if it has fuses whose contacts have corroded through sitting? (Heralds have no fuses)
- Seth
- IAN DURY
- Posts: 342
- Joined: Thu May 10, 2012 7:37 pm
Advertisement
Re: My first car by S. Barrett, aged 26½
![]() by Barrett » Sun Aug 05, 2012 10:39 pm
by Barrett » Sun Aug 05, 2012 10:39 pm
garethj wrote:Don't pull up too many rusty bits at the same time.
1. You'll forget what it's supposed to look like when it comes to repair panels
2. It's disheartening to see so much fresh air from the inside.
Just do a section at a time. Can you get a parts book which has pictures of available repair panels? It'll help you decide where to start cutting the rust out. For small patches and complete heros, making your own patches is fine, but sometimes having a repair panel is the best way forward, it'll have all the right creases in place and it speeds up the work which does wonders for your enthusiasm.
Quite! I am leaving the 'screen surround/ roof area well alone for the time being as this has no bearing on the car becoming legal. The ethos behind this whole endeavour is to do the absolute bare minimum (without actually bodging) to get it roadworthy and do everything else as and when as a rolling resto. The r/h floorpan obviously needs doing pretty much before anything else, so it's getting done. The only other bits of 'necessary' (read: needed for MOT) welding are a small patch - maybe 4" x 5" - on each side of the front of the rear inner arches (I'm sure there is a real name for that bit). Looks pretty straightforward but I've not investigated thoroughly as I want the floor done before I start poking around anywhere else.
There is a proper floorpan pressing available, not particularly cheap baring in mind I'm going to have to pay somebody to fit the thing, but I think this is the best option to get things moving along in the right direction. A new shiny floor with no holes and a throttle actually screwed to the car will be a huge boost. This is the worst bit of rot on the whole car (except the screen surround but we're not talking about that yet, right?) and as soon as it's done I'm gonna feel about 500% better about the state it's in.
Seth wrote:Don't forget when looking at tools perhaps via boot sales etc as IKB suggests or even 'new' ones that metric sizes will be pretty much useless. So while a shiny socket set might look great you might end up using very little of it. However a bigger set that has metric and imperial might work out cheaper than just buying loose imperial bits and does future proof you against buying a French microcar or similar.
Ah yes, metric Vs. imperial. I'd forgotten about that whole 'thing'. Not really sure what it means ('lol'). Which one do I actually need then? A proper(ish) toolkit is #1 on my 'to buy' list, obviously, and I need to get one ASAP so I can actually start fiddling with shit, but I don't want to spunk a load of money on actually useless tools. I told you I was clueless....
Seth wrote:The good news is that the car runs, drives and stops so you're on to a winner already. Getting it to run better is likely to be just a matter of servicing and adjustment. The other good thing about this car is that it seems to have all its Bond specific trim intact.
As you know the doors will be easy enough to find though actual good solid ones are quite rare to find and tend to be expensive.I don't know for sure but the door glass might be peculiar to the Bond. Its certainly not the same as a Herald saloon so you'll need to ask Bond people or compare to pictures of convertible glass. If its the same as a Convertible it will obviously save some work if you managed to get decent complete convert doors.
Is the dash surround drooping in front of the gauges or just that shape?
Well, it doesn't really run anymore since I fiddled with the carbs (obviously) but that's more because I don't want to start it after it started leaking fuel and refusing to actually fire. Also there was a bit of smoke from somewhere. IT'LL BE FINE.
Door glass is Bond-specific but mine are in good shape and hopefully I won't massively smash them everywhere when removing them and installing them in the new doors. The odds are probably not in my favour. Doors shouldn't bee too much of a pain to source, even a slightly crappy one will be infinitely better than the passenger door I have now, which is made up of roughly 45% wob, 50% rust and 5% non-specific metals.
Dash surround has been fitted badly and is now coming off, I'd guess due to the moisture reacting with the glue. Sadly the (new in 2006) door cards have all warped too, so they nicely match the (new, £150 in 2006) carpet set with is a soggy filthy mess. Dash lacquer is cracked and flaking off in big chunks ("cracked and flaking off in big chunks" sums up the whole car, actually) and needs to come out for a total strip down and refinish (ditto the door cappings), and I think it's gonna have to come out to try and sort some of the electrical issues anyway but as a purely cosmetic job this is way, way, way down the list at the moment!
Will grab some underbonnet shots in the morning, the wiring is a horrible mess but the... er... coily metal 'things' that go in what I assumed was the fusebox look to be brand new, or in any case have no signs of corrosion or owt.
DAY 3 of CAR OWNERSHIP STATUS: CONFUSED
Hoow do I go to my thread ? How do I find my forum ? Howdo I go to the page I am typing?
-

Barrett - SIR IAN McKELLAN
- Posts: 165
- Joined: Tue May 08, 2012 8:03 pm
Advertisement
Re: My first car by S. Barrett, aged 26½
![]() by Barrett » Sun Aug 05, 2012 11:16 pm
by Barrett » Sun Aug 05, 2012 11:16 pm
oops, a double post in honour of my first (of many million) proper THICKO QUESTION
Is this the right gasket to go twixt manifold and block as indidicated by the red arrow? Cause my one looks pretty shagged and I'm guessing that bit might be important.
http://www.ebay.co.uk/itm/TRIUMPH-1300-1500-SPITFIRE-MK4-HERALD-TOLEDO-DOLOMITE-PAYEN-MANIFOLD-GASKET-/130600721963?pt=UK_CarsParts_Vehicles_CarParts_SM&hash=item1e6868de2b
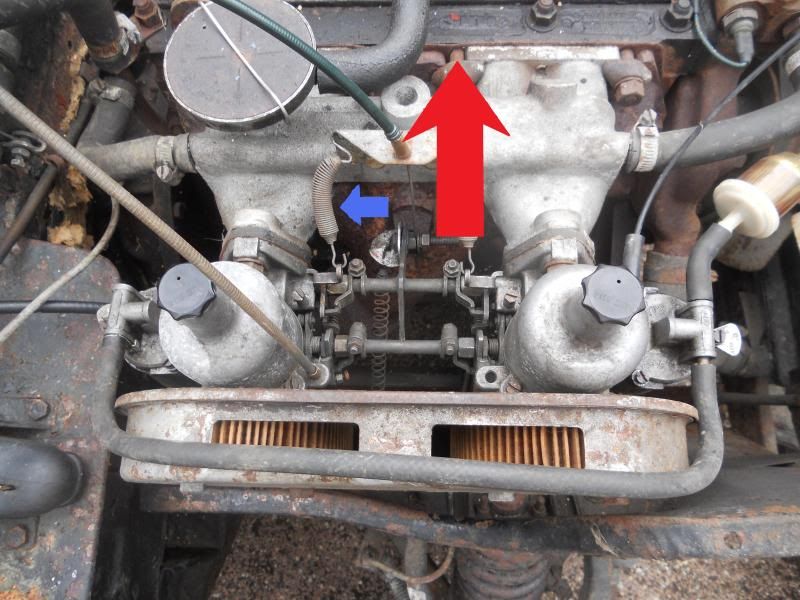
And also, I only noticed today, that spring (blue arrow) looks pretty useless. what is one of them called then? I'm guessing it has some fancy-schmancy old car name and not just 'spring for SU carb' or whatever.
Hopefully I'll be much better at fixing cars than I am at drawing arrows in MS Paint.
THANKS!
Is this the right gasket to go twixt manifold and block as indidicated by the red arrow? Cause my one looks pretty shagged and I'm guessing that bit might be important.
http://www.ebay.co.uk/itm/TRIUMPH-1300-1500-SPITFIRE-MK4-HERALD-TOLEDO-DOLOMITE-PAYEN-MANIFOLD-GASKET-/130600721963?pt=UK_CarsParts_Vehicles_CarParts_SM&hash=item1e6868de2b
And also, I only noticed today, that spring (blue arrow) looks pretty useless. what is one of them called then? I'm guessing it has some fancy-schmancy old car name and not just 'spring for SU carb' or whatever.
Hopefully I'll be much better at fixing cars than I am at drawing arrows in MS Paint.
THANKS!
Hoow do I go to my thread ? How do I find my forum ? Howdo I go to the page I am typing?
-
Barrett - SIR IAN McKELLAN
- Posts: 165
- Joined: Tue May 08, 2012 8:03 pm
Advertisement
Re: My first car by S. Barrett, aged 26½
![]() by Seth » Mon Aug 06, 2012 10:43 am
by Seth » Mon Aug 06, 2012 10:43 am
Yes that is the correct gasket. It is possible that a leaking manifold gasket would be the reason for your rough running but I'd look for other 'adjustable' causes first before dismantling things. Just 'cos it looks rough on the bits you can see doesn't mean its not doing its job correctly.
I wouldn't worry too much about that throttle return spring. Looks like the manifold end might have broken and been replaced by a bit of bent wire. You might be able to make it neater with a bit of appropriate bending, but if its acting as it should (ie pulling the throttle back towards the closed position) then personally I'd spend attention/cash elsewhere first.
I can only wish you luck with respect to the floor pan replacement as it can be a world of pain - body mounts etc. If you can gt away with just replacing the bottom 'tub' bit then it may save creating more issues but I understand the desire to sort it properly as if there are other problems they will only develop at a later stage.
What you assume to be the fusebox is the voltage regulator for the dynamo. If it is working don't fiddle with it inside! But giving the spade connectors a once over where they push on to it might pay dividends as it is a couple of those that will be supplying current to some of those things that don't work. Don't try and pull them off by the wire as wire may just detach from connector. Wiggle the spade itself carefully using a screwdriver if necessary. If you go along the line, one at a time removing and replacing then you can't get them muddled.
MEtric tools are measured in whole numbers (13mm, 15mm etc.) Imperial tools are generally marked with fractions of an inch. Three sizes 7/16", 1/2" and 9/16" will dismantle about 75% of your car. A set of feeler guages will also be useful for setting points gap and rocker clearances.
A step at a time but we know you've got the right attitude
- Seth
- IAN DURY
- Posts: 342
- Joined: Thu May 10, 2012 7:37 pm
Advertisement
Re: My first car by S. Barrett, aged 26½
![]() by Barrett » Mon Aug 06, 2012 9:19 pm
by Barrett » Mon Aug 06, 2012 9:19 pm
Thanks! The floorpan really needs totally replacing but as far as I can see all the bits it joins to are fine so I'm hoping that'll just solve 90% of my structural rust issues in one fell swoop. I'm just working myself up to actually clicking 'buy' on the Canley Classics 'site (seems a little cheaper than Rimmer Bros, and I can't see it for less anywhere else...)
Today's small amount of fiddling (that actually took about 4 hours, I was having fun and didn't even realise how late it had got) amounted to me trying to clean up the connections on the voltage regulator to see if that would do owt about my electrical issues. It didn't.
I chased the odd wires in the passenger footwell and worked out they are connected to the heated rear window. They don't seem to go anywhere though so I'm guessing that's not operational. Still can't work out if there is a separate switch or if it's connected to the demister/ heater controls. Weird add-on switch on the dash appears to be connected to something totally different. Dunno what yet.
Then I did a quick experiment to see if I could find the cause of my non-functioning n/s/f indicator by swapping the bulb for the working o/s one. That didn't work so I guess I've discounted the smallest, simplest, cheapest easiest bit being the issue. Baby steps and all that. There is no obvious fault in the wiring at this end either. The sidelight works fine. FRUSTRATING!
Annoyingly in messing about I've discovered both sidelight units are pretty fugged and I managed to shear off one and a half of the nuts holding the n/s one in. They both need totally replacing really but I just can't see the point in spending money on shiny bits when the important stuff is still so broken, so I guess that can wait.
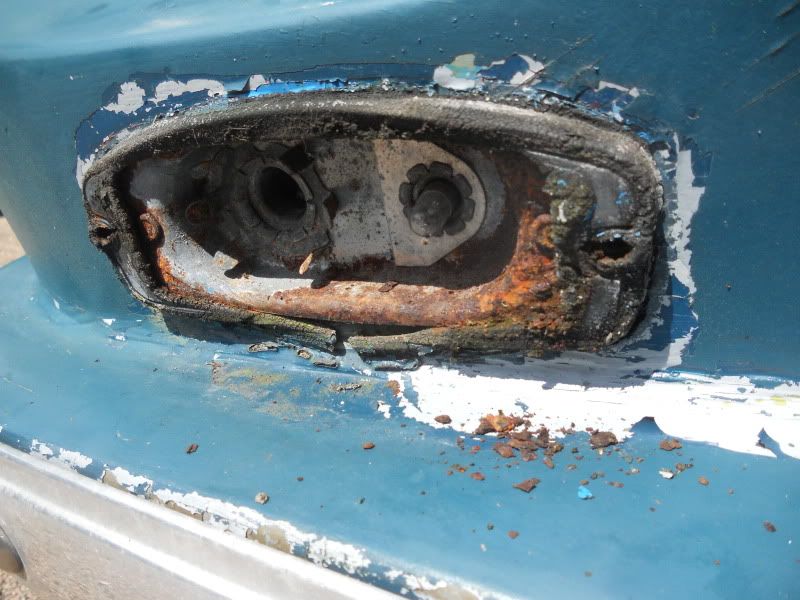
That's the fully functioning one btw!
Today's small amount of fiddling (that actually took about 4 hours, I was having fun and didn't even realise how late it had got) amounted to me trying to clean up the connections on the voltage regulator to see if that would do owt about my electrical issues. It didn't.
I chased the odd wires in the passenger footwell and worked out they are connected to the heated rear window. They don't seem to go anywhere though so I'm guessing that's not operational. Still can't work out if there is a separate switch or if it's connected to the demister/ heater controls. Weird add-on switch on the dash appears to be connected to something totally different. Dunno what yet.
Then I did a quick experiment to see if I could find the cause of my non-functioning n/s/f indicator by swapping the bulb for the working o/s one. That didn't work so I guess I've discounted the smallest, simplest, cheapest easiest bit being the issue. Baby steps and all that. There is no obvious fault in the wiring at this end either. The sidelight works fine. FRUSTRATING!
Annoyingly in messing about I've discovered both sidelight units are pretty fugged and I managed to shear off one and a half of the nuts holding the n/s one in. They both need totally replacing really but I just can't see the point in spending money on shiny bits when the important stuff is still so broken, so I guess that can wait.
That's the fully functioning one btw!
Hoow do I go to my thread ? How do I find my forum ? Howdo I go to the page I am typing?
-
Barrett - SIR IAN McKELLAN
- Posts: 165
- Joined: Tue May 08, 2012 8:03 pm
Advertisement
Re: My first car by S. Barrett, aged 26½
![]() by garethj » Sat Aug 18, 2012 9:31 pm
by garethj » Sat Aug 18, 2012 9:31 pm
As the family are away, today was an excellent chance to help young Barrett with a few items on the Bond.
First thing was the lights, initially there was one (1) working main beam and one (9) working sidelight. And they weren't too bright either.
With a combination of a switched lead and a voltmeter, we traced all the faults at the front end. One sidelight needed a new earth connection which was done by a superb effort on the hand drill and a spare screw from the toolbox. This went to a new star connection for the front end earths, as all the bullet connectors were corroded to nothing. The inner two main beam lamps didn't work and Barrett needs to get a 6 way bullet housing and a 4 way bullet housing. This part of the project was spent as follows
with a little of this too, wiggling wires to see where they come out and to assess the previous (extensive) bodging that had been done
All lights working, even the indicator warning light, and we only had to take apart every single connection on almost every component and either connect it back up, fix it or replace it. The indicators are still a bit feeble so I think a new relay will help.
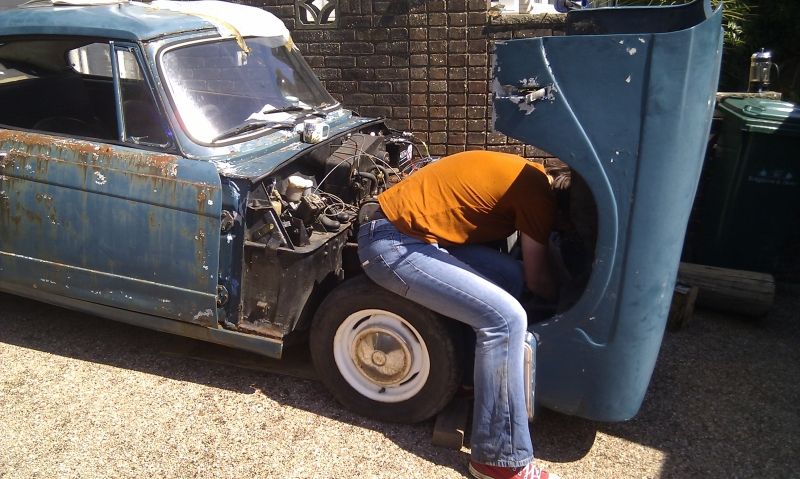
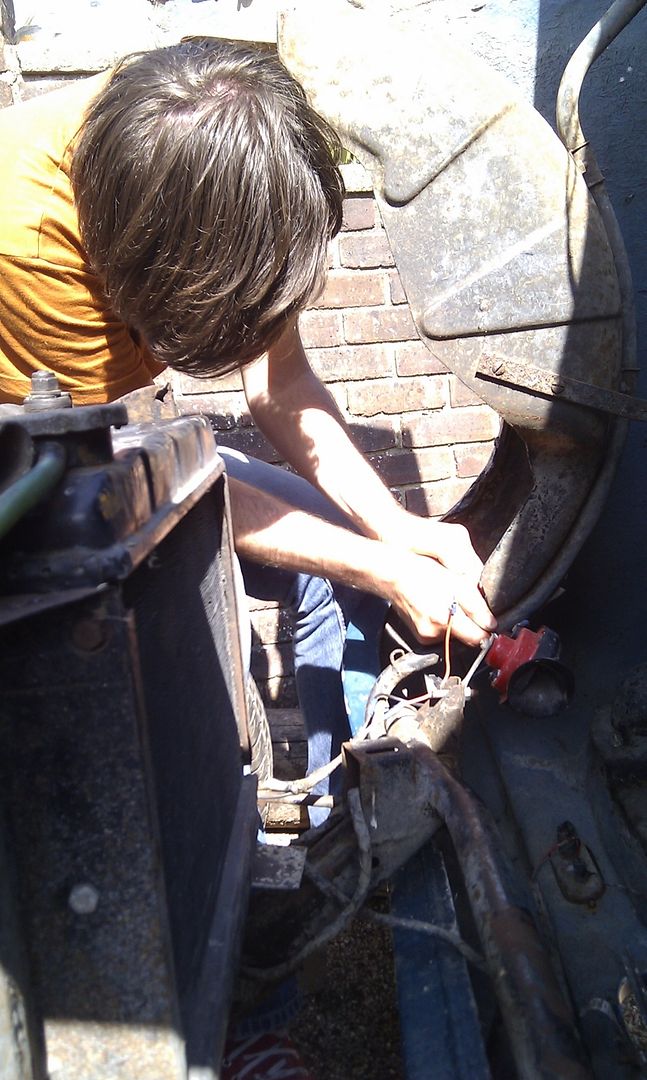
Flushed with the success we tried the horn. The only things wrong with the horn were the connections at both ends, the wires, where they connected to and how it was powered. It was a simple matter of many hours to diagnose all these faults and spot where the broken wires should go, here's the man himself easily disconnecting a wire that's been rusted in place for 40 years
Wipers were next, which really involves the ignition switch. Both of the switches came out and of course the ignition switch was wired differently to the car. Simply reconnecting the missing wires made some juicy sparks, and again the fault was down to the switch, it's connections, the power and the ground. For a laugh, the wiper motor was also poorly, even after cleaning up the connections, the commutator and the brushes. All that made fault-finding slow.
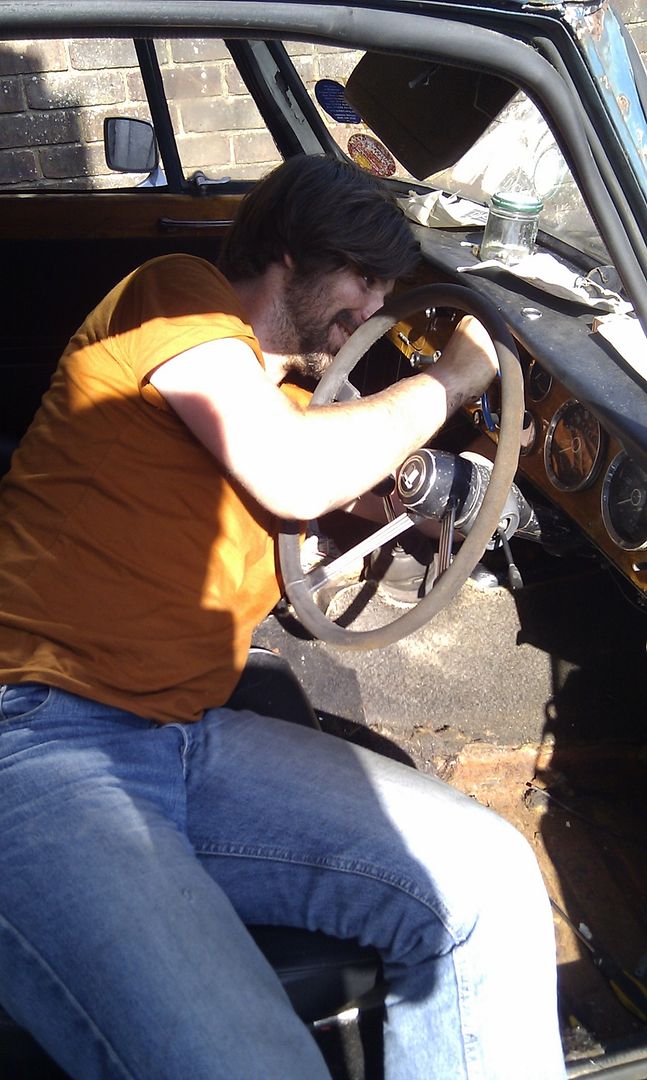
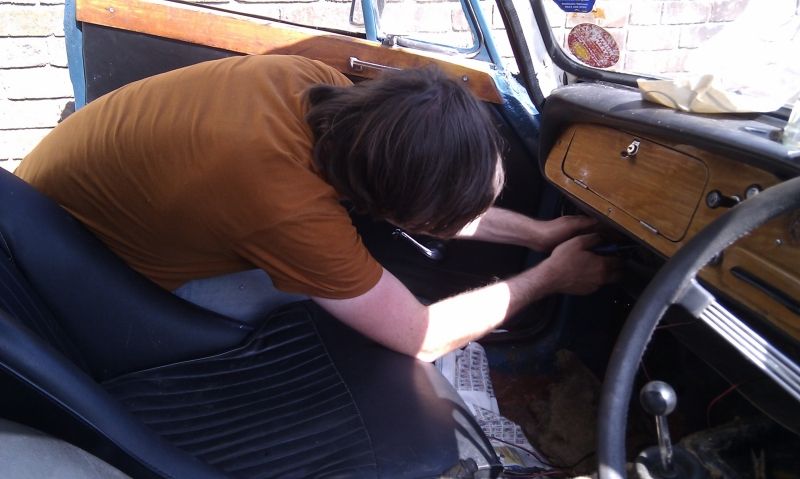
I don't know why he bothered with the lovely bucket seats, he's never in them
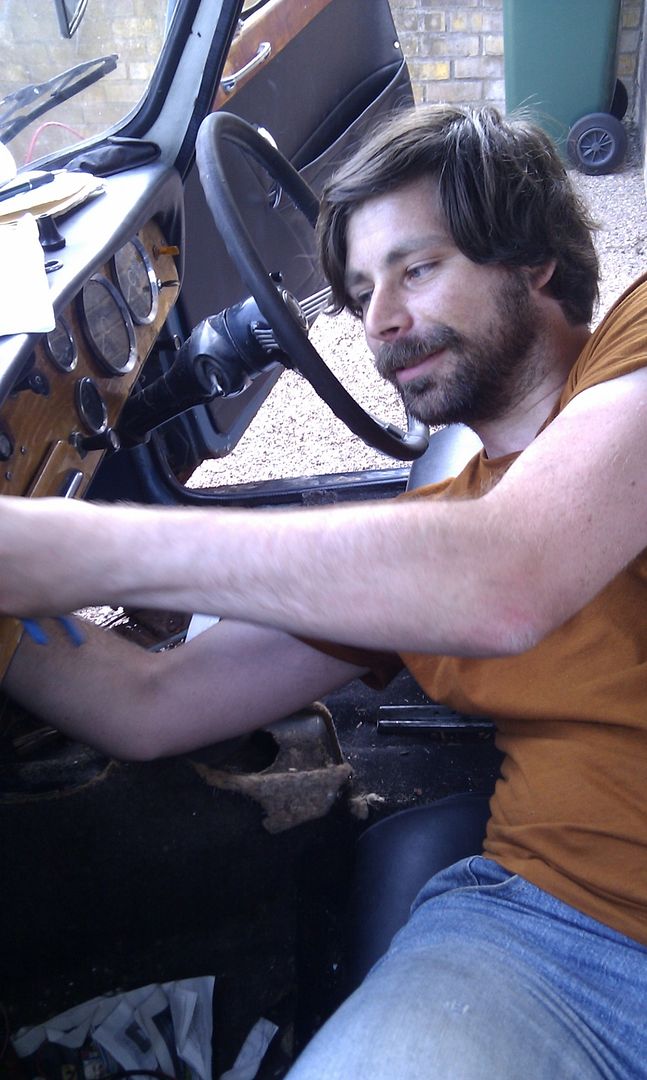
This was trying to get the broken wires in place for the brake lights, they had to go back on the ignition switch. Then the brake lights came on. All the time A bit of fiddling with the switch (also poorly but could be ok) had the brake lights working again.
More trying to trace wires, and this is about where we called it a day after about 9 hours. The wire that should run from the charge warning light didn't seem to be anywhere near the generator or control box
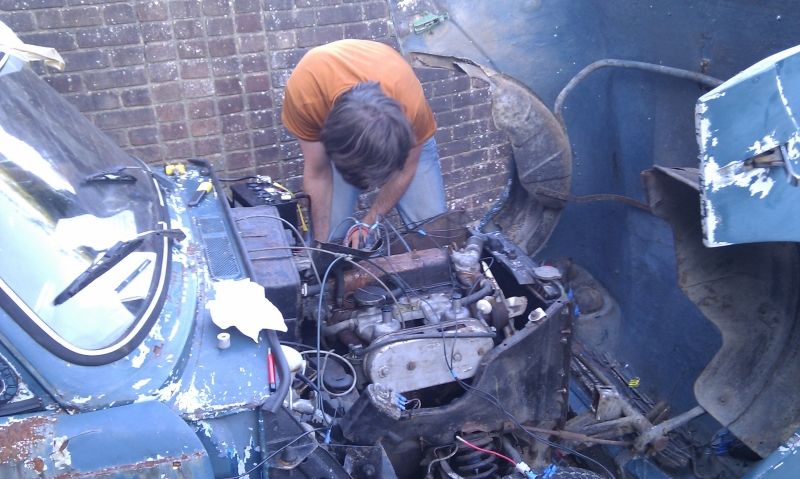
But it'll be a great car when it's finished and I think Barrett should take a vote on the best way to replace the rusty bits - swap the bulkhead or cut sections out. I had a fantastic day, it was just over 100 miles each way and the Peugeot sang its little heart out all the way, I think we can cross "give it an Italian tune-up" off the requirements now.
First thing was the lights, initially there was one (1) working main beam and one (9) working sidelight. And they weren't too bright either.
With a combination of a switched lead and a voltmeter, we traced all the faults at the front end. One sidelight needed a new earth connection which was done by a superb effort on the hand drill and a spare screw from the toolbox. This went to a new star connection for the front end earths, as all the bullet connectors were corroded to nothing. The inner two main beam lamps didn't work and Barrett needs to get a 6 way bullet housing and a 4 way bullet housing. This part of the project was spent as follows
with a little of this too, wiggling wires to see where they come out and to assess the previous (extensive) bodging that had been done
All lights working, even the indicator warning light, and we only had to take apart every single connection on almost every component and either connect it back up, fix it or replace it. The indicators are still a bit feeble so I think a new relay will help.
Flushed with the success we tried the horn. The only things wrong with the horn were the connections at both ends, the wires, where they connected to and how it was powered. It was a simple matter of many hours to diagnose all these faults and spot where the broken wires should go, here's the man himself easily disconnecting a wire that's been rusted in place for 40 years
Wipers were next, which really involves the ignition switch. Both of the switches came out and of course the ignition switch was wired differently to the car. Simply reconnecting the missing wires made some juicy sparks, and again the fault was down to the switch, it's connections, the power and the ground. For a laugh, the wiper motor was also poorly, even after cleaning up the connections, the commutator and the brushes. All that made fault-finding slow.
I don't know why he bothered with the lovely bucket seats, he's never in them
This was trying to get the broken wires in place for the brake lights, they had to go back on the ignition switch. Then the brake lights came on. All the time
More trying to trace wires, and this is about where we called it a day after about 9 hours. The wire that should run from the charge warning light didn't seem to be anywhere near the generator or control box
But it'll be a great car when it's finished and I think Barrett should take a vote on the best way to replace the rusty bits - swap the bulkhead or cut sections out. I had a fantastic day, it was just over 100 miles each way and the Peugeot sang its little heart out all the way, I think we can cross "give it an Italian tune-up" off the requirements now.
- garethj
- IAN McGASKILL
- Posts: 62
- Joined: Sat May 19, 2012 12:50 pm
Advertisement
Re: My first car by S. Barrett, aged 26½
![]() by Barrett » Mon Aug 20, 2012 2:54 pm
by Barrett » Mon Aug 20, 2012 2:54 pm
Well, firstly I want to say a massive thank you to GarethJ for taking the time to come down and sort this for me as I really am totally clueless when it comes to electrics (even more so than anything else). Also thanks for taking photos that make it look like I was actually doing something when in fact 90% of my time was spent watching you fix stuff and making coffee.
It's always nice talking to somebody who really knows what they're doing and can explain things in simple terms that even idiots like me can get their head around. Although I'm still totally clueless I feel I know a bit more about 45 year old British wiring than I did last week.
Sadly, even though we really did spend 9 hours on this there is still plenty that doesn't work, most of it totally inaccessible behind the dash stuff, although I am now quite adept at making myself comfortable with my head on the floor and feet poking out the door it's still so much of a horrible scary web of shit back there I dunno what I'm going to do about it.
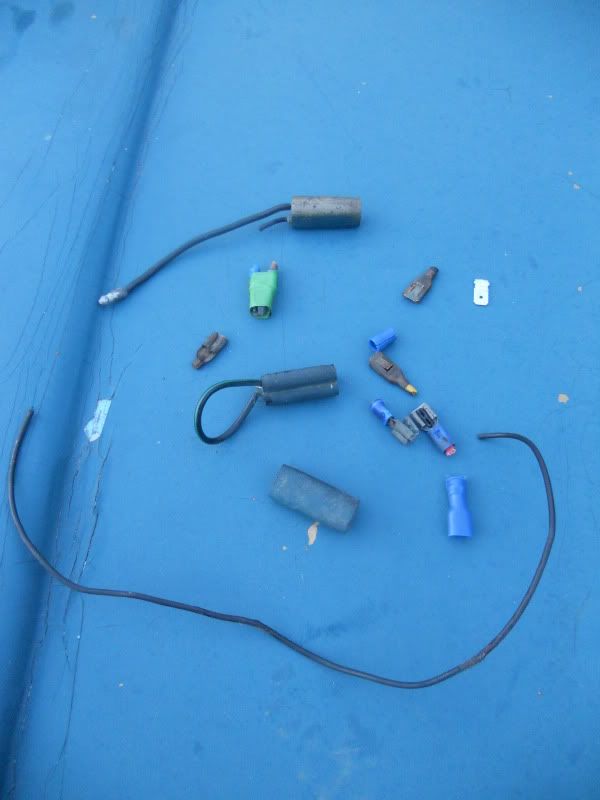
Here's just a small selection of the knackered bits that got binned. I think we replaced about 70% of the connectors at the front of the car
Thanks again Mr. J!
Today, I has mostly been cleaning the sidelight units to celebrate my new fully functioning sidelights and indicators. Cleaning a load of green slime off stuff with a toothbrush is probably the most therapeutic relaxing thing I could do. I wish fixing the entire car was like this. I also did the number plate light which was totally opaque with slime, and managed to fix the actual light just by adjusting the bulbs a bit. Result!

So now all I need to do is replace the entire bulkhead, screen surround and floor section and I'll be well on the way to an MOT. How hard could that possibly be?
It's always nice talking to somebody who really knows what they're doing and can explain things in simple terms that even idiots like me can get their head around. Although I'm still totally clueless I feel I know a bit more about 45 year old British wiring than I did last week.
Sadly, even though we really did spend 9 hours on this there is still plenty that doesn't work, most of it totally inaccessible behind the dash stuff, although I am now quite adept at making myself comfortable with my head on the floor and feet poking out the door it's still so much of a horrible scary web of shit back there I dunno what I'm going to do about it.
Here's just a small selection of the knackered bits that got binned. I think we replaced about 70% of the connectors at the front of the car
Thanks again Mr. J!
Today, I has mostly been cleaning the sidelight units to celebrate my new fully functioning sidelights and indicators. Cleaning a load of green slime off stuff with a toothbrush is probably the most therapeutic relaxing thing I could do. I wish fixing the entire car was like this. I also did the number plate light which was totally opaque with slime, and managed to fix the actual light just by adjusting the bulbs a bit. Result!
So now all I need to do is replace the entire bulkhead, screen surround and floor section and I'll be well on the way to an MOT. How hard could that possibly be?
Hoow do I go to my thread ? How do I find my forum ? Howdo I go to the page I am typing?
-
Barrett - SIR IAN McKELLAN
- Posts: 165
- Joined: Tue May 08, 2012 8:03 pm
Advertisement
Re: My first car by S. Barrett, aged 26½
![]() by garethj » Mon Aug 20, 2012 6:59 pm
by garethj » Mon Aug 20, 2012 6:59 pm
Getting the knobs off the switches is easy, get a thin screwdriver to push on the tiny hole (the one that we arranged so it's pointing down on the wiper switch). That's a sprung plunger in there, when you hold the plunger down you can pull off the knob.
There's plenty in there to snigger over
There's plenty in there to snigger over
- garethj
- IAN McGASKILL
- Posts: 62
- Joined: Sat May 19, 2012 12:50 pm
Advertisement
39 posts
• Page 2 of 4 • 1, 2, 3, 4
Who is online
Users browsing this forum: No registered users and 15 guests